This is part 2 of an expansive series about using websockets in Laravel and Laravel Echo package. Click here to see the Websockets Series Overview.
Now that you have your project setup, its time to get down to writing the code. As we have mentioned in other sections of this tutorial series, the goal of this series is to learn how to use Websockets in Laravel and understand Laravel Echo. We will be creating a live-updating comment system on a fictitious blog system.
So in the previous part, we set up a basic blog app, which allows us to create, read, update, and delete blog posts. This is a great start to a blog, but now its time to build a commenting system so that users can leave comments on our posts. Eventually we will use websockets to make these comments update in realtime, so when a user writes a comment, it is updated live on every page around the world of people who are leaving comments on that same page, without refreshing the page.
So the first thing to do is set up a way to submit a comment via ajax. This way we can submit the comment without needing to refresh the page. By the end of this tutorial, we will allow a user to submit a comment to a blog post without refreshing the page. The next part of this series will show us how to broadcast that change and update it on other users’ pages. But for right now we need to build the commenting system and allow comments to be submitted via ajax.
Create a Migration for our Comments Table
Before we even mess with comments, we need to setup a database table to persist any comments in our system. We also know that we need to make a model to interact with our new table, and luckily Laravel allows us to complete both these steps with one simple artisan command.
php artisan make:model Comment --migration
We use the make:model artisan command and add the --migration flag onto the end of it. This will create both the Comment model and a migration for a new comments table to go with it. Isn’t Laravel magical?
Let’s start by working with the migration. Open up the migration file now for the comments table.
This is the schema we want to use in our migrations file:
Schema::create('comments', function (Blueprint $table) {
    $table->increments('id');
    $table->integer('user_id')->unsigned();
    $table->integer('post_id')->unsigned();
    $table->text('body');
    $table->timestamps();
});
As you can see, we have a standard timestamp and primary id fields, and then we added a column for the user_id and a column for post_id which will create the relationship to the user who wrote the comment, and a relationship to the post that the comment belongs to. Finally, there is a text column which contains the main content of the comment (which we are calling “body”). So this is overall, a very basic and standard schema for our comments table.
Now we can run the migration to put this new schema into effect in our database.
php artisan migrate
Define Model Relationships
Now that we have our new comments table setup, its time to solidify the relationships we setup in the previous step. If you remember, we created the post_id and user_id to store relationship data which tells us what post this comment belongs to and which user wrote the comment.
We will define these relationships now by opening up our newly created model file called Comment.php which should be in app/Comment.php and was created in the previous step.
Inside of this model file, we can define a relationship for user() and another for post(). These link to the id columns in the users and posts tables respectively.
Your app/Comment.php model file should look like this now. This adds the two relationships and makes sure that we can mass-assign the new user_id and post_id columns.
<?php

namespace App;

use Illuminate\Database\Eloquent\Model;

class Comment extends Model
{
    protected $fillable = [
        'body', 'user_id', 'post_id'
    ];

    public function post()
    {
        return $this->belongsTo('App\Post');
    }

    public function user()
    {
        return $this->belongsTo('App\User');
    }
}
And of course we need to make the inverse of these two new relationships to finish defining them. So in our app/User.php file add the following change:
<?php

namespace App;

use Illuminate\Notifications\Notifiable;
use Illuminate\Foundation\Auth\User as Authenticatable;

class User extends Authenticatable
{

    use Notifiable;

    /**
     * The attributes that are mass assignable.
     *
     * @var array
     */

    protected $fillable = [
        'name', 'email', 'password', 'api_token',
    ];

    /**
     * The attributes that should be hidden for arrays.
     *
     * @var array
     */

    protected $hidden = [
        'password', 'remember_token',
    ];

    public function accounts() {
        return $this->hasMany('App\SocialAccount');
    }

    public function posts() {
        return $this->hasMany('App\Post');
    }

    public function comments()
    {
        return $this->hasMany('App\Comment');
    }
}
Now we need to define the inverse of our Post relationship. So in our app/Post.php file we want to add the inverse of the relationship.
<?php

namespace App;

use Illuminate\Database\Eloquent\Model;

class Post extends Model
{
    protected $fillable = [
        'title', 'content', 'published'
    ];

    public function user()
    {
        return $this->belongsTo('App\User');
     }

    public function comments()
    {
        return $this->hasMany('App\Comment');
    }
}
That is it for our model. We have now setup the Comment model and established the database relationships between a comment record and the post that it belongs to, and the user who authored the comment.
That will be it for our model. Time to continue on, this time focusing on our controller and its routes.
Create API Routes for Comments
Before we start writing code for our comments controller, we are going to establish a few routes so that we have some URIs to hit, in order to save new comments into the database. The two routes we need for the purposes of this tutorial is a route to give us all of the comments for a specific post (this allows us to display them on a page), and the second route that we need is a route that allows us to submit a new comment and save it in the database.
Because the comments will be submitted and retrieved via AJAX, that means we will actually want to create some API routes, instead of your standard web routes. API routes are created in the routes/api.php file, these routes will not do CSRF validation and will also by default return responses as JSON data instead of as HTML.
It is also important to note that inside of our routes/api.php file there is a route group for auth:api and every route inside of this route group will have api authentication middleware applied to them. That means that Laravel will attempt to validate a user via api authentication before letting them hit these routes.
This is a good thing when we are saving a new comment, since we have configured our table to require a user’s id be saved with every comment. In order to ensure that we have a user_id whenever we save a new comment, then we need to make sure that a user submitting the comment has been authenticated. This will allow us access to the currently logged-in user’s ID.
On the other hand, when we just want to get all the comments for a post, we do not care if the user is logged in or not. Guest users should have access to viewing comments, so we want to put this route outside of the api authentication route group, so that anyone will have access to this route, even if they are logged out or do not have an account.
So let’s create these two routes now and we will send both of these requests to the CommentsController which we will create in the next step. We will have an index action to display all comments for a post, and the store action to save a new comment. Your routes file will look like this:
<?php

use Illuminate\Http\Request;

/*
|--------------------------------------------------------------------------
| API Routes
|--------------------------------------------------------------------------
|
| Here is where you can register API routes for your application. These
| routes are loaded by the RouteServiceProvider within a group which
| is assigned the "api" middleware group. Enjoy building your API!
|
*/

Route::get('/posts/{post}/comments', 'CommentController@index');

Route::middleware('auth:api')->group(function () {
    Route::post('/posts/{post}/comment', 'CommentController@store');
});
As you can see the index action is outside of the authentication middleware, and the store action is inside of the authentication middleware. This is extremely important!
So we have two routes available to us now. The first one is a GET route: /posts/{post}/comments which will will allow us to dynamically submit a post id such as /posts/10/comments to get all of the comments for post #10.
Inside of the authentication block we have our second route which is a POST route: /posts/{post}/comment which allows us to save a new comment and dynamically insert the post’s id into the URL. This isn’t necessary we could have easily just passed in the post id with the request headers, but I decided to match the URL format that was used with the index action. Either method would work however.
So now we have our API routes setup and they both reference this CommentsController which doesn’t exist yet. So now let’s complete the logic loop by creating the controller and adding some logic into the index and store actions (controller methods).
Setup our Comments Controller
Now as you would expect, we have our migrations setup, we have our model, we have our routes, and now its time to actually create our controller so we can start writing the code necessary to save a new comment into the database.
We will once again use an artisan command in the terminal to create the controller.
php artisan make:controller CommentController
This creates a controller called CommentController.
Now inside of the new controller, we want to add some logic for our index and store actions (these are the two actions we referenced when setting up our routes). Of course as you grow your project you will probably have more actions needed, but this is all that’s necessary for our tutorial.
I kept things pretty simple for these two actions. The index action simple returns all the comments for that post as a JSON format, and the store action does some basic validation and saves a new comment record into the database with mass-assignment.
<?php

namespace App\Http\Controllers;

use Illuminate\Http\Request;
use App\Post;
use App\Comment;
use Auth;

class CommentController extends Controller
{
    public function index(Post $post)
    {
        return response()->json($post->comments()->with('user')->latest()->get());
    }

    public function store(Request $request, Post $post)
    {
        $comment = $post->comments()->create([
            'body' => $request->body,
            'user_id' => Auth::id()
        ]);

        $comment = Comment::where('id', $comment->id)->with('user')->first();

        return $comment->toJson();
    }
}
There are several things happening all chained together in the index action. We start by getting the $post record which is typehinted from the method call. Laravel goes and gets this record for us automatically based on the ID that was passed into the URL paramter. Once we have that record we can get all of the comments by calling ->comments(). We chain this further by eager-loading the corresponding users fields with the ->users(). After that we call ->latest() which will sort the records with newest first. Finally ->get() completes the query and puts it all together. So in one chain we are able to get exactly the records we want and output it as JSON. Pretty magical Laravel stuff there.
Now looking at the Store action, notice that when we store the comment we don’t pass in the post_id value. This is because we use type-hinting in the method parameters to get the current post record from the url. Since we have a post record we can call the comments()->create() from the post record which Laravel will use to automatically attach that post_id to this comment magically.
Take some time to read over the code thoroughly to make sure you understand it. If you have any questions leave a comment below, and I will be happy to explain it further.
Load Comments on Blog Posts
Now that we have our routes and controller logic setup, its time to impliment everything into our application. In our example application, I have already written the HTML needed to display comments for users. I have hardcoded a default comment to demonstrate this. So if you go view a blog post right now, you will see a comment at the bottom of every blog post that is the same.
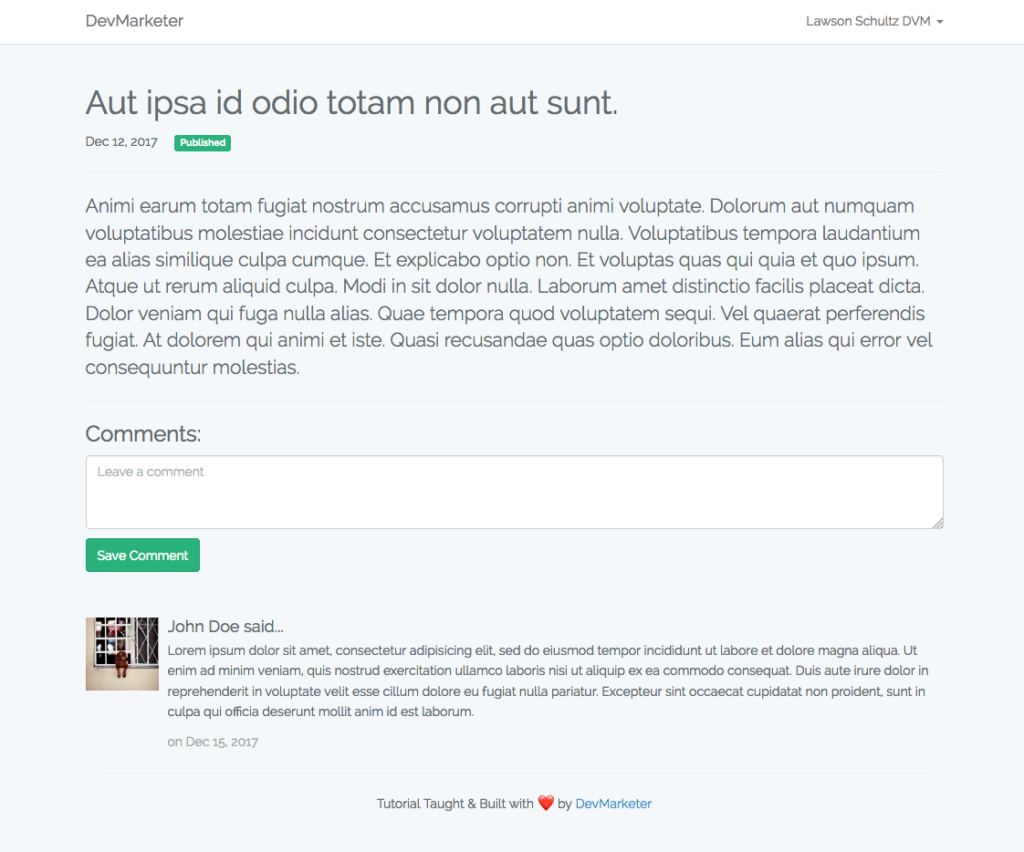
So as you can see, I already have a basic HTML structure for the blog post, and for the comment. This comment is hardcoded though, and we need to make it dynamically load the real comments for each post. This is easy, and we will do it now.
Since we will be useing Vue.js later on to submit new comments, we will use Vue.js now to load the comments. This means that all of the comments will be loaded into the DOM via Vue.js and Vue.js will manage the comments for us. While Vue is not necessary to make this work, it does make life a lot easier for updating the DOM and keeping our page up to date. It will make your life a lot easier down the road since we can add a new comment to our comments object and it will show up instantly on the page. That’s one of the major benefits to Vue.js is the two way binding, making it super easy to keep the visual DOM in sync with our javascript objects.
Start by creating a new Vue.js instance at the bottom of our post.show view. I usually do this inside of a blade section called ‘scripts’. This section allows us to customize the javascript for each specific page on top of our master template scripts.
Notice: In order to use this section make sure you create a @yield('scripts') in your main template first. I have already done this if you are using the example code, but remember to do this on your own projects before you try to use a scripts section.
The starting code will look like this:
@section('scripts')
<script>
    const app = new Vue({
        el: '#app',
        data: {
            comments: {},
            commentBox: '',
            post: {!! $post->toJson() !!},
            user: {!! Auth::check() ? Auth::user()->toJson() : 'null' !!}
        }
    })
<script>
@endsection
This will setup a Vue instance on our page. The instance is linked to the div with an id of ‘app’ which is a wrapper div around the whole page. This means that our whole page is accessible and controllable with this Vue instance.
We also define some data attributes that Vue can manage. We want to store all of our comments in this comments data attribute. To start this is empty, but we will do an AJAX call in a moment when the page loads to populate this object with all of the comments for this specific blog post. Then we have the commentBox object which is empty upon page load, but eventually we will bind this to the value of our comment text box. So this will always contain (and be linked to) the text box used by a user to submit a new comment.
Next we have the post object which will simply contain all of the information about the current blog post. We take the full PHP $post object (the same object we use to populate the post information on the page above with blade) and pass that to Vue so that its available for future use. We call ->toJson() on it, to convert the PHP object to a JSON (javascript compatible) object.
Lastly, we have a user object, which is simply the JSON representation of the PHP $user object that we use in the Laravel Blade portion of this view. You will notice a terenary operator which checks to see if the user is logged in before we output the User information to this object. If the user is not logged in, than calling Auth::user()->toJson() would output an error. So we first check to see if the user is logged in before we attempt to do this. If the user is not logged in than we simply output 'null' and then in Vue we will know that the user is not logged in.
This completes our Vue data object. Next we want to create a few methods so that we can get comments from the server and submit new comments that a user is attempting to submit. These will both go inside of the Vue ‘methods’, so that we can call them from within our page.
@section('scripts')
  <script>
      const app = new Vue({
          el: '#app',
          data: {
              comments: {},
              commentBox: '',
              post: {!! $post->toJson() !!},
              user: {!! Auth::check() ? Auth::user()->toJson() : 'null' !!}
          },
          methods: {
              getComments() {
                  axios.get('/api/posts/'+this.post.id+'/comments')
                       .then((response) => {
                           this.comments = response.data
                       })
                       .catch(function (error) {
                           console.log(error);
                       }
                  );
              },
              postComment() {
                  axios.post('/api/posts/'+this.post.id+'/comment', {
                      api_token: this.user.api_token,
                      body: this.commentBox
                  })
                  .then((response) => {
                      this.comments.unshift(response.data);
                      this.commentBox = '';
                  })
                  .catch((error) => {
                      console.log(error);
                  })
              }
          }
      })
  </script>
@endsection
So inside of this you can see how we added a methods block and inside of that block we create two methods.
The first method is getComments() which will get all the comments for the current post, and the second method is postComment() which is what actually submits a new comment to be saved into our database.
Both of these methods will utilize the API Routes that we have created earlier in this tutorial. They are also both ran as asyncronous (AJAX) requests using Axios, an Async javascript library that comes bundled with Laravel.
To start lets look at getComments() method. This is a single line of code that uses the power of the Axios library to send an Async request to our /posts/{post-id}/comments url endpoint. axios.get means that we are wanting to send an ASYNC request as a GET HTTP method. You can see that we dynamically change the {post-id} portion based on the current post. We get the post ID from the post vue object that we just barely created. This allows us to pass that post ID as part of the URL. The .then() block is a javascript promise which runs after the response has been returned from our API. This allows us to actually work with the response data (which in this case should be all of the comments for this post). Because we already set this up in our CommentController@index, we know that the response will come back as an array of comments for the post. This format is perfect for our purposes so in our code block above, we simply set this.comments = response.data to set the Vue comments object equal to the response from this ajax request (which should include all of our comments).
Lastly the .catch() block is the other part of the javascript promise, which runs if some sort of error occurs. Hopefully it doesn’t happen, but we always have to be prepared in case it does. For the purposes of this tutorial we will simply output the error to the console using console.log. For a production app you probably want to display a message to the user, but this will work for now.
That is it for our getComments() method. We can now call this method to get all of the comments for the current post, and set them equal to the this.comments in our Vue instance.
The second method we need to set up is the postComment() method, which will post a comment to the /posts/{post-id}/comment API route as a POST method. Once again we use axios to do this, but this time we use axios.post to send it as a POST method instead of a GET method. We dynamically insert the post.id just like we did in the getComments() method to make sure that the correct post ID is associated with this comment.
The setup for axios.post is slightly different than axios.get because the POST request generally requires some form data to be submitted with the request. All of this data is passed in as an object in the second parameter. The two keys we want to pass in is the api_token (which is used for authentication) and the actual comment body (which is taken from the this.commentBox Vue property and is linked to our comment box).
The .then() method is our javascript promise after the server returns a response back from the API request. We expect that the response will contain the comment data in JSON format, for the comment that was just saved. Because of this, we add the new comment data to our this.comments vue object so that it can be updated on the page (more on that later). You might notice that we use this.comments.unshift(response.data) to add the new comment to this array. The .unshift() method is a new ES6 javascript method that we can use to manipulate an array and it adds a new item to the beginning of an array and pushes every other item in the array down one index. Since this.comments is an array of comments, we can use .unshift to add a new comment to the beginning of the array. Once we set Vue up in our HTML, this will visually put the new comment up at the beginning of the comment list.
The second and final line inside the .then() method is this.commentBox = ''. This simple line will set the value of commentBox back to being empty (and since it will soon be linked to the comment input text box, it will also clear out the text box to be ready for a new comment).
For the .catch() method, we will log the error to the console just like we did in the getComments() method. Again, we would probably want to do something more visual to our users in a production app, but this will work for our tutorial.
So there we go, we have methods available to both get all of the comments of the current post, and also to submit a new comment for this post. When we call these methods, then we will run the api requests and update the Vue objects. This makes our lives very easy, clean, and DRY (don’t repeat yourself programming).
Loading Comments on Page Load
Now we have the basics of our Vue instance setup and we have two methods we can use to get all comments for the current post, and to submit a new comment for the current post.
The first method is getComments() which gets all the comments for the current post. We only want to call this method one time, and that is when the page first loads. This way all the comments are retrieved from the server and saved into the Vue instance data object. When using Vue, we can define an option called mounted() {} in our Vue instance, which will run one time when the Vue instance finishes mounting (completes loading). Within this mounted(), we will call our getComments() method. This way we know it will get called after the page loads, and only get called one time.
Our Vue instance will look like this once we add the mounted() block:
@section('scripts')
  <script>
      const app = new Vue({
          el: '#app',
          data: {
              comments: {},
              commentBox: '',
              post: {!! $post->toJson() !!},
              user: {!! Auth::check() ? Auth::user()->toJson() : 'null' !!}
          },
          mounted() {
              this.getComments();
          },
          methods: {
              getComments() {
                  axios.get('/api/posts/'+this.post.id+'/comments')
                       .then((response) => {
                           this.comments = response.data
                       })
                       .catch(function (error) {
                           console.log(error);
                       }
                  );
              },
              postComment() {
                  axios.post('/api/posts/'+this.post.id+'/comment', {
                      api_token: this.user.api_token,
                      body: this.commentBox
                  })
                  .then((response) => {
                      this.comments.unshift(response.data);
                      this.commentBox = '';
                  })
                  .catch((error) => {
                      console.log(error);
                  })
              }
          }
      })
  </script>
@endsection
That is all it takes to call our getComments() method upon page load. Now our method will run, which will send an API request, get the comments back as a response, and then set the this.comments property in Vue equal to an array of all our comments for the current post.
Now that this.comments contains an array of all our post comments, we can display that on the screen by looping through this object using Vue in our HTML. We will use v-for to loop through this.comments and display all of the comments on the page.
In our HTML where I have already hardcoded a comment HTML block. This is a good example of a standard comment, now let’s make some minor changes so that Vue populates and loops through it automatically for us.
Search the resources/views/posts/show.blade.php file for the HTML block that contains our comment. It is wrapped in a div with a class of media. This block represents a single comment. We will use v-for to loop through every comment in our comments Vue object. Each time there is another comment in the comments Vue data array, Vue will create another media block and populate it according to that element of the array.
This is what it looks like (remember that this is only a portion of the resources/views/posts/show.blade.php file):
<div class="media" style="margin-top:20px;" v-for="comment in comments">
    <div class="media-left">
        <a href="#">
            <img class="media-object" src="http://placeimg.com/80/80" alt="...">
        </a>
    </div>
    <div class="media-body">
        <h4 class="media-heading">@{{comment.user.name}} said...</h4>
        <p>
          @{{comment.body}}
        </p>
        <span style="color: #aaa;">on @{{comment.created_at}}</span>
    </div>
</div>
For the most part you don’t need to change the HTML that is already in our demo project. We are just adding some additional markup in a few places so that we can pass the DOM handling off to Vue.js.
These are the lines of importance, starting at the top:
<div class="media" style="margin-top:20px;" v-for="comment in comments">
This is the <div> that wraps every comment, and is the <div> that we want to loop through. Each comment in our comments Vue array will be looped through and open up a new <div class="media"> and then inside the loop we will have access to the current iteration under the reference of comment (this will only be available inside of this block, not outside of it). By writing v-for="comment in comments" inside of this <div> we are telling Vue to loop through the comments array and reference each iteration as comment.
Now, inside of this media div, we can just use comment to represent the current comment we are working with. Inside of this we have all of the record data for that comment such as the id, body, and user information.
We won’t be doing this in this tutorial, but eventually in your app you would most likely have a user’s avatar saved under something like user.avatar. This is most likely a URL to some Amazon S3 hosted profile picture. Referencing this you would be able to dynamically fill in the profile picture on the comment with calling comment.user.avatar like this:
<img class="media-object" src="@{{ comment.user.avatar }}" alt="@{{ comment.user.name + ' Profile Picture'}}">
Of course this won’t work for this demo, because we do not have avatars saved in our database. But I wanted to show you how it might look if you implimented avatars. But for this tutorial, just leave the avatar alone, and it will be populated using a placeholder image service.
Next, we have the comment body which is all inside of the <div class="media-body">...</div> section. Once complete it looks like this:
<div class="media-body">
    <h4 class="media-heading">@{{comment.user.name}} said...</h4>
    <p>
        @{{comment.body}}
    </p>
    <span style="color: #aaa;">on @{{comment.created_at}}</span>
</div>
This should be pretty self explanatory, but notice that we populate comment.user.name to fill in the user’s name. Then inside of the paragraph tags we use comment.body to get the comment’s main content. Finally at the bottom we use comment.created_at to get the date the comment was created.
Together this completes the work needed to load comments for a post. Now when the page is loaded, Vue will mount and then run our getComments() method which sends off an API request, gets the comments from the server and puts them into an array called comments within our Vue instance. Meanwhile, inside the HTML we loop through that same array and display the HTML needed to show it to the user. This will update automatically after the response is received from the server and put into the comments array. This is the beauty of Vue.js!
Now if you refresh the page, you probably won’t see a comment block at all anymore. This is completely expected! The reason is because the server requested the comments from the server and you probably don’t have any comments for this post yet. So the server returns back an empty array as part of its response and then Vue sets the comments array to be an empty array to match the server’s response. There is nothing to loop through and so Vue doesn’t display any comments at all. If you want to directly interact with the comments array in your javascript console, you can add a new comment and see that it pops up on our page now.
Another way to test it is to manually add a new comment in your database for that post ID and then refresh the page. Now that comment should come back to the page after the page is refreshsed and displayed it to the users.
Save New Comments
The final step we want to finish is to allow users to submit a new comment for the current post. We already have a text box for users to type in a new comment and a nice little button for them to press when they are ready to submit it.
What we need to do is make sure to bind the text inside the textbox to our commentBox Vue object. This will make it easy to submit the comment’s text when a user decides to save the comment. Speaking of saving a comment, we also want to trigger our postComment() method whenever someone presses that button.
Most of the hard work already exists within the postComment() method that we already wrote. So things should be pretty simple.
To get started let’s two-way bind that text box to our commentBox object. We do this with v-model directive. This will ensure that the anytime the text box changes, the value will always stay synced with the value of commentBox Vue object. Also, because the binding goes both ways, if we change the value of the commentBox object, than it will also change the text inside the textbox. This will make things incredibly easy for us going forward.
The comment box field HTML looks like this, with the Vue markup:
<h3>Comments:</h3>

<div style="margin-bottom:50px;" v-if="user">
    <textarea class="form-control" rows="3" name="body" placeholder="Leave a comment" v-model="commentBox"></textarea>
    <button class="btn btn-success" style="margin-top:10px" @click.prevent="postComment">Save Comment</button>
</div>

<div v-else>
    <h4>You must be logged in to submit a comment!</h4> <a href="/login">Login Now >></a>
</div>
Notice how we added the v-model="commentBox" to the <textarea></textarea>. This is what sets up that two way binding between the text in this textarea and the commentBox Vue object.
If we take one step back, you will notice that we wrapped the whole <textarea></textarea> in a <div v-if="user">. This means that the textarea and submit button will only be shown if a user is logged in (remember that if a user is not logged in how we set user = null).
Below that, we have another <div v-else>, this is another vue directive which will display itself only if the v-if that we set up before it returns false. Think about these as the Vue.js version of @if, @else, @endif from Laravel Blade.
So basically if the user is NOT logged in, then we don’t want to show them the comment form because we know that we will get an authentication error (remember we set up the route to require authentication). Instead we display a little message that notifies the user that they must be logged in, with a link to log in if they would like.
The final thing we need to set up is when the user presses the button to submit the new comment. You can see that we added another view directive on the <button> just below the <textarea></textarea>. We want to establish an event listener for when the button is pressed to trigger and run the postComment() method. In Vue.js the way you establish an event listener is with the v-on directive. So we could add something like this <button v-on:click="postComment"> to tell Vue to run the postComment() method when that button is pressed. Since this is a button, most browsers attempt to submit a get request to the same page whenever a button is pressed. This is a strange default browser behavior, but its something we need to accept. If the browser refreshes (or submits another request) then it will interupt the AJAX request that our postComment() method is attempting to do at the same time. So we want to stop this behaviour. Usually you would add event.preventDefault() to our method to prevent it from attempting its default behavior (submitting a pointless request/refresh). In Vue.js we can actually chain this onto the same directive to make it easier to read.
<button v-on:click.prevent="postComment">
This would perform our task beautifully. However in the main code block earlier on this page you may have noticed we didn’t use v-on at all… so what gives? Well in Vue you can actually use the @ as a shortcut for v-on. This makes things even cleaner. So instead the final button code is:
<button @click.prevent="postComment">
This says that when the button is clicked, you should prevent the default behavior and instead run the postComment() method. Exactly what we need. This will run that method, which submits the API request to our server telling it to create a new comment.
When the response is returned from the server (after a successful comment save), then it will add the new comment to the beginning of the comments array. In the previous section we setup the HTML to loop through the comments array, and because Vue is awesome, it will automatically notice the change to the comments array and it will run the loop again, displaying our newly submitted comment at the top of the page, because it is now the first comment in the comments array. Cool stuff huh?
Change the code and now test it. Hopefully everything is running smoothly.
Conclusion
Now we have completed our comments section of the demo. We are able to get all the comments for a single post and we can save new comments and submit them to the database via our API requests.
This will set us up perfectly for the next part of the series, where we actually broadcast the new comments to everybody else who is on that page right now, and then we will update any of the newly broadcasted comments on the page, so that the new comments will be updated even if someone else submits the comments.
The next part will actually start using Pusher, Broadcasting, and Laravel Echo. So get ready for the really good stuff, coming up next!
Read Mastering Websockets in Laravel – Part 3: Connecting our Socket Server
If you get stuck at any part along the way, feel free to leave a comment below so somebody can help you out. Be sure to read through the comments to see if anyone else has the same problem or question that you have.
Great post. I was checking continuously this weblog and I am
impressed! Extremely helpful information specifically the remaining section 🙂 I
maintain such information much. I used to be looking for this
certain information for a very lengthy time. Thank you and good luck.
Alex, keep recording/publishing!
Hi,
I learned a lot from your tutorials. I want to learn Real Time notifications. Did you make any tutorial for this? Something like I post from backend and all user get the notification that we publish the new post.
Many Thanks,
Waqar
You could do that much the same way. Create a public channel that is subscribed to on every page of your site. Then when a new post is published, you can push an event to that channel and everyone would see that notification.
checked the issues ?? https://github.com/DevMarketer/Laravel_Echo_Tutorial/issues
Nice one
Nice
Hey i am one of your oldest YouTube subscriber. I love the way you explain each and every little detail. You helped me allot learning laravel in level for beginners playlist.
Hii, where is the “Read Mastering Websockets in Laravel – Part 3: Connecting our Socket Server”? Has it been published yet?