This is part 0 of an expansive series about using websockets in Laravel and Laravel Echo package. Click here to see the Websockets Series Overview.
Before we get too carried away with the code necessary to write and incorporate websockets into Laravel, I want to make sure we are all adequately prepared by understanding how websockets work in general and some important terminology that you will be hearing a lot.
Understanding the terminology of websockets will help the process of reading documentation and other tutorials much easier to follow.
I created a YouTube video that you can check out to hear this stuff explained in person, but we will cover all the same materials here.
Visual Presentation:
If you want to download the slides from my presentation you can download PDFs here, or Google Slides here.
What Are a Websockets?
It is probably good to understand what a websocket is before we start learning how they work. The important thing to understand is that a websocket is a web communication protocol (similar to HTTP) that enables full duplex communication between two systems. When we say “full duplex” we really mean two-way constant communication. Its important to note that both websockets and HTTP, are TCP Protocols but they are very different. The benefit is that websockets can run on port 80 and 443 (SSL), which means that websockets can run in compatibility with our existing HTTP services, which is basically any website ever.
HTTP is a protocol we use for most of our web requests. If you frequent the DevMarketer site or the DevMarketer YouTube Channel than you are very familiar with sending web requests like GET, POST, UPDATE / PATCH, and DELETE. These are all methods of communicating on the HTTP protocol. We send a single request to a server, it processes information and returns a response back to us. It is like sending a single text message. Once the server sends us back a response it can not change or update that response, just like how you can not change the content of a text/SMS message after it has been sent. HTTP is a one-time process. In contrast, websockets are live feeds, that can send updates in real-time to our clients.
If HTTP protocol is a text message, than the Websockets Protocol would be Skype or FaceTime.
Ok, so we have used the word protocol a lot already, and that’s a word that is a bit like yelling “Voldemort” in a crowded room. So if i haven’t lost you yet, let me round it up in plain English instead of “geekspeak”.
Most of the web requests we send are HTTP requests. But websockets are another new type of request which allows for real-time, live communication back and forth between our server and the client. This means we can let a client know about new information or changes in real-time, and update it onto their screens so they see things immediately as they happen without needing to refresh the page.
Websockets open up the possibilities for us to build PWAs or Progressive Web Apps. This means basically that we can create web applications that feel like native applications in the browser. Imagine the possibilities of being able to send information back and forth to the server without a page refresh and knowing it gets there nearly instantly. This allows us to create some types of web applications you have never been able to build before.
Examples of Websockets That You Already Know
This technology might sound like a secret that I am just sharing now for the first time, but actually it has been around for a while and you have already used many products that rely on websockets to work.
Live Chat
Whether you love it or hate it, we have all used livechat in the browser and these experiences are powered by websockets! In fact live chat applications are actually quite simple to build once you understand the fundamentals of websockets.
Notifications
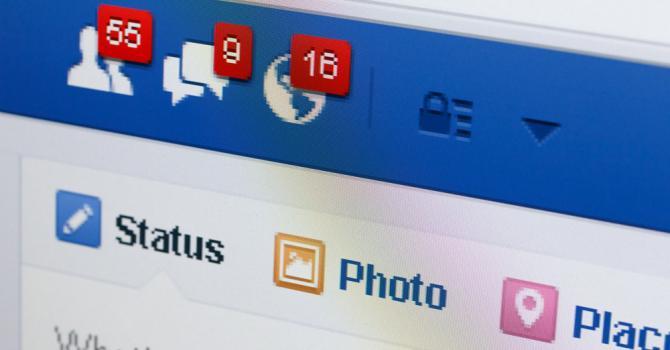
When you see those notifications pop in on your favorite social media network, without you even needing to refresh the page, this is all thanks to the power of websockets once again. When your friend “likes” your latest photo, Facebook’s servers mark it in the database and then trigger an event which is broadcast to you in realtime via websockets. Then using React.js they update it on the screen so you see it immediately.
Collision Detection/ Presence
We are seeing this become more and more common in CRM’s and CMS’s to see that someone else is already making changes to a page at the same time you are. Preventing someone from editing a page when someone else is already editing it will help prevent confusion (when someone inadvertently overwrites someone else’s work) and also frustration and errors.
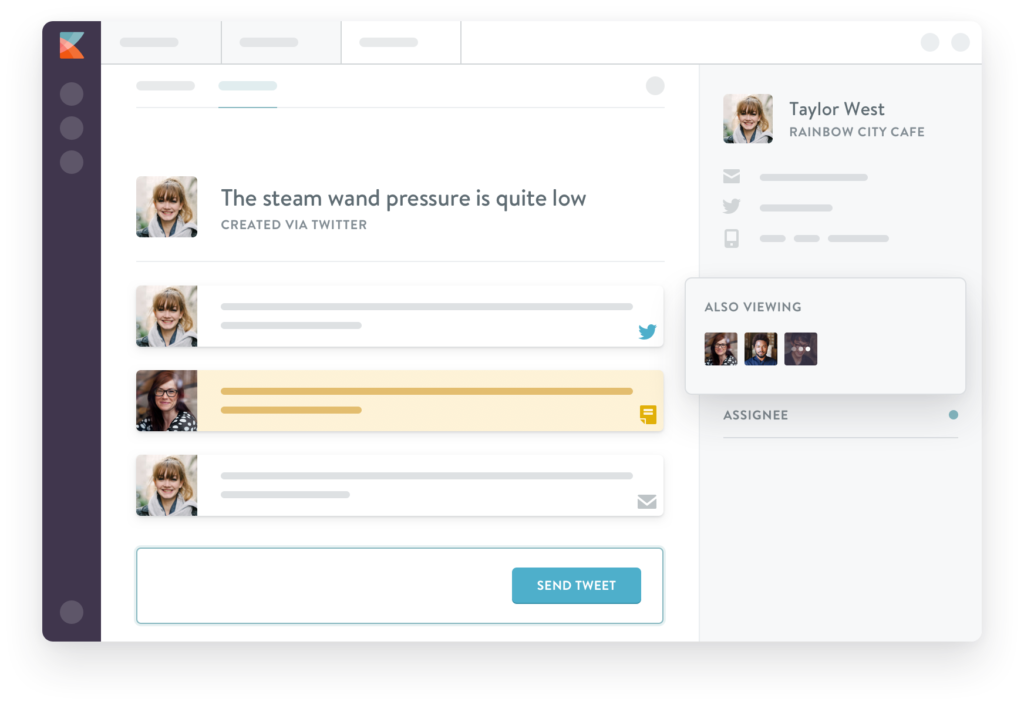
We can lock changes while someone else is editing, and unlock it as soon as they finish. This feature is usually referred to as “collision detection” in software development. Another popular feature we are seeing more is “presence” which shows how many other people are currently viewing a specific page or document. As people leave or enter the document page, we see this information update in realtime.
Google Docs (Live Collaboration)
We have all used Google Docs and been amazed at how we can watch our colleagues type and make changes to a document in realtime. This is all using websockets to update the location of the cursor and the content on the page.
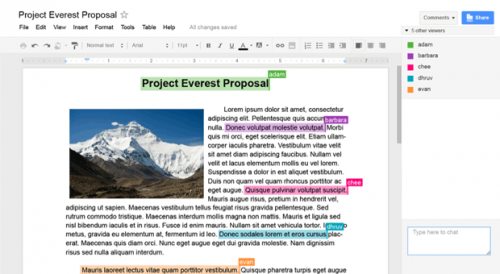
With some knowledge of websockets you could even build a tool like this.
Three Components of Websockets
Now that we know how awesome websockets can be, lets talk about how they work. There are three main components that must work together to create our websocket experiences.
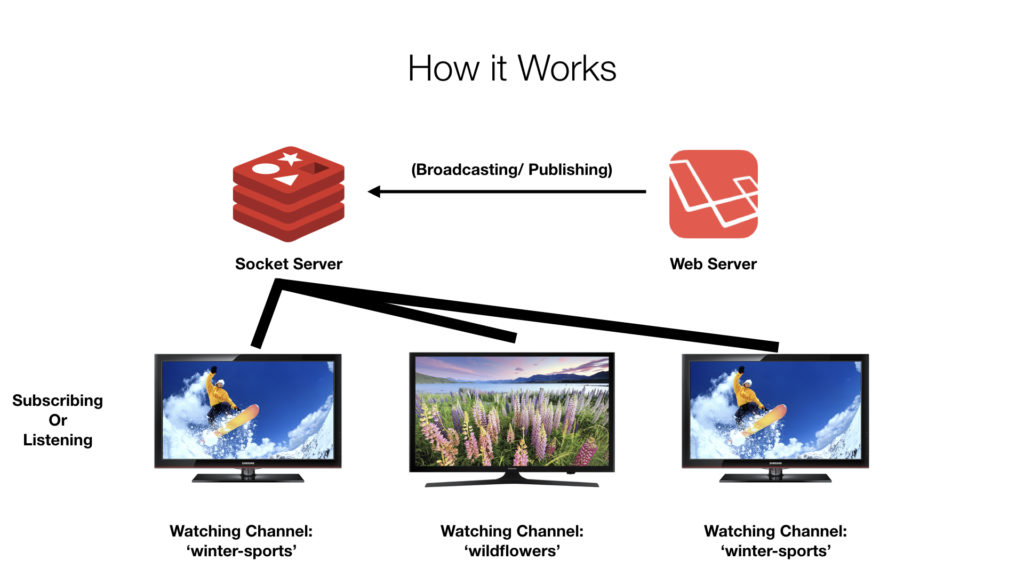
The three main components and how they work can be seen here. First we have the web server, which sends information about changes over to the socket server which is what actually handles the passing and distribution of the information over the websocket protocol to various client browsers on users’ computers around the world.
Web Server
This is a Laravel Server in our case, but could also be Django or Node.js. It is a server side program which manages our database and routes. When something new happens, the server will save information in a database like normal, but then in order to notify the clients of the new change (so they can display a new notification or update the page) it will send a request over to the socket server.
The web server can not connect to the browsers directly because it runs on the HTTP protocol. It sends the new event information via a POST request or sometimes an API request to the socket server.
Socket Server
The socket server is the server that keeps track of what all the browser clients need. The clients will subscribe to channels which tells the socket server what type of events they wish to receive updates on.
The socket server manages and maintains these open websocket communications with the clients. It also will receive events from the web server and then distribute them to any connected clients. The socket server translates the HTTP protocol into a websocket protocol and makes sure that the right clients get the right events.
The Browser Client
The browser client is generally any browser that the user is using to view the webpage. Javascript libraries are used (such as Laravel Echo) to subscribe to channels with the socket server and to receive events over the channels.
Once we receive a new event. The socket server itself doesn’t change the view of the screen or update the information. Instead the client will receive the event and its payload and use javascript to manipulate the DOM in order to display the new information to the user.
We often combine other javascript libraries to help us do this, such as Vue.js, React, or jQuery. We translate a serialized JSON payload into a visual representation that the user is looking for.
Websocket Terminology
The last thing i want to cover before we start implimenting websockets in real life is to understand a few fundamental terms that you will hear about. Understanding these terms will make it a lot easier to understand any documentation or tutorials you try to follow in the future.
Channels/Topics
These two terms generally refer to the same thing, and different services will use a different word to describe this. I generally call them Channels, but don’t get confused if you hear the word Topics instead because many prominent socket service providers use the word “topics” in their documentation such as Amazon Web Services (AWS) and Google Cloud Engine.
A Channel is an organizational element of websockets. If you can imagine, we might have thousands of users on an application at the same time, and thousands of events occuring per second. But not every event is appropriate for every user. For example if User 1 likes User 2’s photo, we want to send a notification event to User 2, but User 3 doesn’t need to know about this event because it doesn’t pertain to them.
By using Channels we can organize our events to make sure that events only get distributed to the appropriate users. So for example if a notification is intended for user #101 then we might send the event on a channel (or topic) called user.101.
In the demo project we will write in the next few tutorials, we create a channel for every single blog post. So post #10 will be on a channel called post.10, this way users on post #11 won’t get any information that was intended for post #10. This keeps things separated for us and allows us to organize which events go to the right kind of users.
Channels or Topics are the fundamental organizational element that makes websockets manageable.
Subscribe/ Connect
The term subscribe is used when a client tells the socket server that it is ready to receive events for a specific channel. We will say that a user has “subscribed to channel user.101” meaning that they have established a connection to the socket server for that channel and are maintaining it. If a user is subscribed to a channel when a new event comes in, then they will receive that event over the channel.
If the user leaves that page, then they will close the channel connection and effectively “unsubscribe” from the channel.
Event
These are new things that happen with our application that we want to send to all of our clients. An event generally has a alpha-numeric name and belongs to a specific channel. If a channel is the highest level organizational element in websockets, then events are the next organizational element after that.
Events allow us to separate different actions that might have occurred on the same channel. For example, in our demo we will be building a real-time live commenting system. Each blog post is going to have its own channel and any events that belong on that channel will be sent down that channel. So when a new comment is created, we will let everyone who is currently on that blog post at the time, know that a new comment was created. We can do this by sending a new-comment event on the post.10 channel. But what if a user edits a comment on the post.10 channel, we want to send a different event, this time maybe an edit-comment event. If a comment is deleted than maybe a delete-comment event will be sent. These events allow us to separate different actions.
On the client-side we must listen independently to each type of event and then we trigger a javascript method to handle that event when it occurs. So we might handle a new comment event differently than an edit comment event, and so forth.
Events can also pass a serialized payload. This allows us to pass details about the event in a JSON format. So for example a new-comment event might include a payload with the comment’s content, time it was written, user information, and user avatar. This will be useful for us in order to display it on the screen for the user.
Conclusion
Hopefully this has been helpful in understanding the fundamentals of websockets. We still have a lot to learn as far as actually working with websockets and writing the code to make it all come together.
However, taking the time right now, to learn how websockets work will make your life so much easier as you progress throughout not only this course, but other tutorials and documentation.
Be sure to check out the next post in this series Mastering Websockets in Laravel – Part 1: Setup and Configuration. This post will help you setup the demo project and also go over the steps necessary to set up websockets and Laravel Echo into a new Laravel application.
Don’t hesitate to leave a comment below if you have any questions. And of course check out the videos on YouTube and be sure to subscribe if you haven’t already.
I love this, keep it up nice work Devmarketer
Great Keep it up
Part 1 linked in this article is broken.